Fast Converter help
Configure output directory
Transcode subtitle file to UTF8 encoding
1. Basic converting
1.1 Convert movie to MP4
1.2 Add external audio
stream to movie
1.3 Add external subtitle
stream to movie
1.4 Crop movie
1.5 Cut movie
2. Advanced converting
2.1 Create video stream
2.2 Create audio stream
2.3 Combine video stream
and audio stream, add subtitle
Configure output directory
Before using Fast Converter, you should
configure the directory that Fast Converter saves your converted files.
In your Movies directory, create a
directory named Fast Converter.
Go to menu
Fast Converter ->
Preferences, open
Preferences panel.
Click
Browse... button and select the
directory that you have just created.

Click Save button to save your change
and close the panel.
Transcode subtitle file to UTF8 encoding
To be used with Fast Converter, subtitle
file must be in UTF8 encoding. If subtitle file's encoding isn't UTF8, you have
to transcode it into UTF8.
Go to menu
Tools -> Subtitle
Encoding... to open
Subtitle Utility panel.
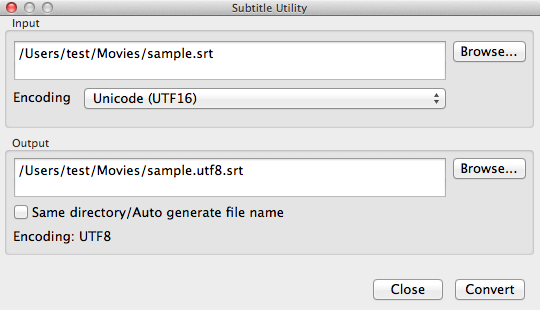
Click Browse... button
(Input group)
to select the subtitle file (ex: sample.str), then select it's encoding.
Click
Browse... button (Output group)
to select the location to save output file.
Click
Convert button to start.
1. Basic converting
1.1 Convert movie to MP4
- Click the
Add Movie button  and select the movies that you want to convert.
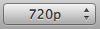
- Select the output device
 & maximum output size
 .
.
- Click the
Start button
 to start to
convert.
to start to
convert.
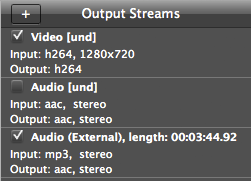
1.2 Add external audio stream to movie
- Add your movie to
Input Movies view
by using Add Movie button
.
- Select your movie on
Input Movies
view, the Output Streams view will show a list of streams of your movie.

- On the
Output Streams view,
deselect all internal audio stream(s).
- Click
 button on the top of
Output Streams view and select an audio file that you want to add to your movie.
button on the top of
Output Streams view and select an audio file that you want to add to your movie.
- Select the output device
& maximum output size
.
- Click
Start
button
to start to
convert.
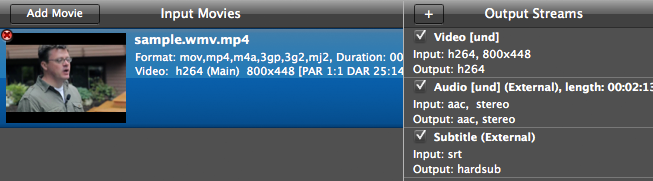
1.3 Add external subtitle stream to movie
- Add your movie to
Input Movies view
by using Add Movie button
- Select your movie on
Input Movies
view, the Output Streams view will show a list of streams of your movie.
- On the
Output Streams view,
deselect all embeded subtitle stream(s).
- Click
button on the top of
Output Streams view and select an subtitle file (ASS/SRT) that you want to add
to your movie.
- Select the output device
& maximum output size
.
- Click
Start button
to start to
convert.
Note: your subtitle file must be in
UTF8 encoding, see How to transcode subtitle file to UTF8.
1.4 Crop movie
- Add your movie to
Input Movies view
by using Add Movie button
- Select your movie on
Input Movies
view, the crop view will display a frame in your movie.
- Click the
Crop button
 .
.
- On the crop view area, drag the
green rectangle to select crop area.

- Select the output device
& maximum output size
.
- Click
Start button
to start to
convert.
1.5 Cut movie
- Add your movie to
Input Movies view
by using Add Movie button
- Select your movie on
Input Movies
view, check Cut button.
- On the Start
text field
 , type the
starting time (hh:mm:ss)
, type the
starting time (hh:mm:ss)
- On the Stop text field
 , type the
stopping time (hh:mm:ss)
, type the
stopping time (hh:mm:ss)
- Select the output device
& maximum output size
.
- Click
Start button
to start to
convert.
Example:
- Cut from
the beginning of movie to
01:20:12, type
00:00:00 on
Start text field and
01:20:12 on
Stop text field.
- Cut from
00:20:35 to
01:13:00, type
00:20:35 on
Start text field and
01:13:00 on
Stop
text field.
- Cut from
00:40:00 to the end of movie, type
00:40:00 on
Start text field and leave Stop
text field blank.
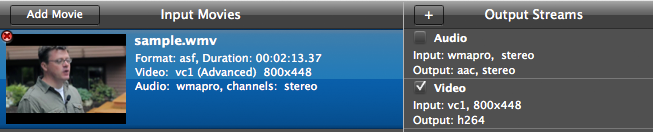
2. Advanced converting
Advanced converting is recommended
for WMV, RMVB movie.
Load your movie
(sample.wmv) to
Input
Movies view,
2.1 Create video stream
- On
Output Streams view, select the
video stream you want and deselect all other streams.
- Select the output device
& maximum output size
.
- Click Start button , Fast Converter
will create sample.wmv.mp4
file in Output Directory.
2.2 Create audio stream
- On
Output Streams view, select the
audio stream you want and deselect all other streams.

- Select the output device
& maximum output size
.
- Click Start button , Fast Converter
will create sample.wmv.m4a file in
Output Directory.
2.3 Combine video stream and audio stream, add subtitle
- Remove
sample.wmv from
Input Movies
view.
- Add
sample.wmv.mp4 (2.1) to Input
Movies view.
- On the top of
Output Streams view, click
button to add
sample.wmv.m4a (2.2) to
Output Streams view.
- If you have a subtitle file, add it to
Output Streams view by clicking
button.
- Select the output device
& maximum output size
.
- Click Start button and enjoy you
converted movie.